Published: Apr 10, 2024 by Oscar Nydza Nicpoñ
Contributing to PyKX
Introduction
Contributing to an Open Source project can be daunting at first glance, but if you have some know-how in both Python and q, you have an opportunity to become a contributor in KX’s PyKX library. In this post, we will give you a comprehensive guide on how to become one.
Enter PyKX
PyKX is a library tailored towards Python users that aims to bring them closer to the kdb+/q environment by enabling the use of q from a Python environment and vice-versa. It also provides conversion between Python and q types, making migrations from Python to q as seamless as possible. We dedicated two articles that went into a lot more detail about this migration process here and here. More specifically, we laid down a simple path that users might want to follow if they wished to perform a similar kind of migration.
However, that’s not the topic of today’s blog post. As we have already established, PyKX is the perfect gateway into open source development for those with knowledge of both Python and q, and in this article we will give you a step by step guide on how we implemented a simple function and contributed to this library.
PyKX is composed of several different modules, but today we will focus on the pandas API since it’s the module we have been contributing to up until this point. This API aims to be a drop-in replacement for pandas syntax, making migrations as trouble-free as possible. Consider the following example, assuming df represents a Pandas DataFrame:
> df
   Person   Age  Single
0    John  24.0   False
1    Myla   NaN    True
2   Lewis  21.0    True
3    John  33.0    True
4    Myla  26.0   False

> df.mean(numeric_only=True)
Age       26.0
With PyKX, we could essentially perform the same computation with the exact same syntax:
> import pykx as kx
> t = kx.toq(df)
> t
pykx.Table(pykx.q('
    Person  Age Single
    ------------------
    John   24.0      0
    Myla             1
    Lewis  21.0      1
    John   33.0      1
    Myla   26.0      0
'))
> t.mean(numeric_only=True)
pykx.Dictionary(pykx.q('
    Age   | 26.0
'))
We stumbled upon this API when looking for ways to make our PyKX code more “Pythonic” and, since it allows for the use of pandas-like syntax, it was the perfect fit for our needs back then. However we also noticed that a few functions were in need of an implementation. So, since this is an open source project, we decided to implement those missing functions ourselves!
Setting up the development environment
The very first thing you should do after setting up your environment should be to fork KxSystems/pykx into your own repository where you have permissions to create branches and do some actual work. Then, you should take a look at the README file, which contains a really nice introduction to what PyKX is and its goals. But right now we will focus on the Building from Source section and its detailed instructions. In our case, we decided to install on Linux, since it is our platform of choice for these kinds of projects, but Windows and OS X are viable options as well!
The quick step by step goes as follows:
- Install the build dependencies.
- Create the Python virtual environment (venv from now on) and activate it.
- (Optional) Run
pip3 install -U '.[all]'to build the library and make it available on your venv.
Be aware that the last step may take a few minutes depending on your hardware.
In order to be able to run some tests (which will be required for the contribution), you also need to run these commands (on Linux), as the documentation states:
export PATH="$PATH:/location/of/your/q/l64" # q must be on PATH for tests

export QHOME=/location/of/your/q #q needs QHOME available
With that done, you should be able to run the tests for the whole project with the following command:
python -m pytest -vvv -n 0 --no-cov --junitxml=report.xml
Again, be aware that this command may take several minutes to complete due to it executing every test.
Since this is completely optional at this point, feel free to skip it. Later on we will provide a command to run a single test, which makes the whole development experience much more streamlined.
Congratulations! You have now set your development environment up and are ready to start writing some code!
Useful tools
- As for the IDE / text editor, use your Python editor of choice.
- Inside your venv, be sure to have Jupyter installed to have quick access to your function after the build is completed. This is particularly useful when developing tests. A q kernel for Jupyter may also be handy when debugging your q code. As an alternative, a VSCode plugin that makes you able to run q code also exists.
Note:
To install Jupyter inside your venv, run the following command after activating it:
pip3 install jupyter
Or
pip3 install jupyterlab
If you would rather use the lab environment.
Development
With all of that done, we will now focus on developing a simple function from the pandas API: count. But first, be sure to take a look at the DEVELOPING.md file for some development guidelines. This file contains the team’s code styling preferences, so be sure to stick to them.
After taking a decision on the function of the pandas API we will be developing, we should take a look at what that function actually does. In this particular case, count returns a dictionary of sorts with the columns as the key and the count for each column as the value:
>  df
   Person   Age  Single
0    John  24.0   False
1    Myla   NaN    True
2   Lewis  21.0    True
3    John  33.0    True
4    Myla  26.0   False

>  df.count()
Person    5
Age       4
Single    5
dtype: int64
The implementation should be easy on q: we can just count on each column and we should get the result we want!
Note
Those of you proficient on pandas and q may notice that count each doesn’t do exactly the same as df.count() on pandas. The later doesn’t count the null values whereas the q version does.
q)t
a b
---
a 0
b 1
  2

q)count each value flip t
3 3
Sometimes, it isn’t fully clear whether to follow the pandas’ syntax and semantics or lean closer to its q counterpart. For example, if you want to build a function that is one to one with pandas’ interface, you may find yourself taking care of several edge cases. More often than not, this will make your function much longer and less maintainable in the future, so if you find yourself in that situation, our suggestion would be to try to keep it as simple as possible, or even better, ask the PyKX team directly via their support page.
In the case of count there weren’t really all that many edge cases, so we decided to do a one to one recreation of the pandas equivalent’s interface. Later on we’ll see how we tackle the parity issue.
Now that the underlying functionality is clear, we can focus on bringing the functionality to PyKX. For that, we need to know where to place our function and how to make it available.
PyKX’s codebase is quite extensive, so we need to make sense of it. We can assume the source code is inside the src directory, and that the pandas API code should be inside the pandas_api subdirectory, but there are quite a few Python files inside so… Where do we put our implementation?
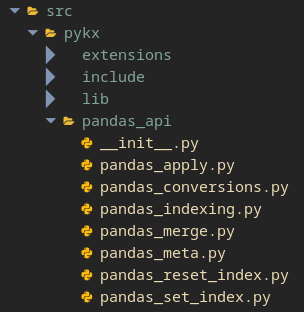
Well, all of them contain code for the pandas API, of course, but where we place it is up to the “family” of functions it belongs to. Is it related to indexing? Then write your function inside pandas_indexing.py. Is it a special type of join? Then pandas_merge.py is most likely where you want to write it.
In our case, since count is a general function, we can place it under pandas_meta.py, which contains a plethora of general purpose functions. Inside that file, try to write your implementation around similar functions so you can use them as reference.
Getting familiar with the syntax
As with any new environment you need to work on, it may take a while to get used to it. I would personally look around the different files and try to take mental notes (or regular notes, I won’t judge you) on how the functions are implemented, which patterns repeat themselves, which don’t, etc…
If you have done just that for the pandas_meta.py file, you may have some questions. What does @convert_result and @api_return do? Why do so many functions use preparse_computations on the first line? Let’s try to answer those questions.
Both @convert_result and @api_return are decorators. What that roughly means is that they are able to perform some computation before and after executing a function. In this case, @convert_result is defined on that very same file, and looks like this:
def convert_result(func):
    @api_return
    def inner(*args, **kwargs):
        res, cols = func(*args, **kwargs)
        return q('{[x; y] y!x}', res, cols)
    return inner
We can see that:
- Runs the “child” function
func(potentially, our implementation forcount). - It builds a dictionary with the functions return values.
So, since pandas’ implementation of count seems to follow this pattern (returning a dictionary, that is), we can use this function to build the final result in the shape it must have. We can also see that we need to return a tuple containing the list of results and the column names, both following the same order.
With this information we can move on to developing the function’s internal logic.
Note
The @api_return decorator is used when we want to return a table-shaped object. For example, if we wanted to round all the values from a table or filter it, we would need to use that decorator instead of @convert_result. As an exercise, try to find where this decorator is defined and take a look at its implementation to get a better understanding of how and when to use it.
Implementing the function
Next up, let’s take a look at our accepted implementation of count and go line by line explaining what’s going on. The code looks like this:
@convert_result
def count(self, axis=0, numeric_only=False):
    res, cols = preparse_computations(self, axis, True, numeric_only)
    return (q('count each', res), cols)
As you can see, there are a few things going on but the implementation itself has a very small footprint. We will come back to it later but, if we ignore the third line, we can see that we are indeed using the @convert_result decorator, so we need to return the dictionary values, which will be the count on each column and the keys which, in this case (and most), will be the column names.
The second line is the function declaration and here we try to stick to pandas’ interface so that integration with existing codebases is as seamless as possible. In this case, we need to define the axis and numeric_only parameters, with their respective default values.
On the last line of code we actually perform the counting on each of our columns’ values. If you are familiar with PyKX, you most likely have used pykx.q to run q code from Python, and this is exactly what is going on here. We are running count each on our res value.
But wait a minute, what does res contain? Well, that’s a good question. In order to understand that, first we need to take a look at what preparse_computation does.
If you have ever worked with pandas, you might have noticed that many methods share a very similar interface: axis, skipna and numeric_only. These parameters, among others, dictate how those methods handle the data. Since they are so common, the PyKX team has developed the preparse_computation function to avoid repeating code. I encourage you to take a look at what it does exactly, but in rough terms:
- Gets the table’s values and column names.
- Depending on the parameters, it transforms the column values according to them.
- It returns a list containing the column values (so, a list of lists) and the column names as a tuple.
To exemplify this function’s interface, let’s run it on the table we were working with to see what’s being returned:
> t
pykx.Table(pykx.q('
    Person  Age Single
    ------------------
    John   24.0      0
    Myla             1
    Lewis  21.0      1
    John   33.0      1
    Myla   26.0      0
'))

> preparse_computations(t, axis=0, skipna=True, numeric_only=False)
(pykx.List(
  pykx.q('
    `John`Myla`Lewis`John`Myla
    24 21 33 26f
    01110b
  ')),
 pykx.SymbolVector(
  pykx.q('`Person`Age`Single'))
)
We can see that we are getting just what we expected, the exact values of the table with the null values being skipped (see the float list).
With this in mind, we can now fully understand the implementation we wrote. In this case, the preparse_computation takes the axis and numeric_only values straight from the parameters and for the skipna value we pass a True, meaning that if we find a null value, it should be dropped. This last hardcoded parameter allows our count to behave exactly as the one found on the pandas library.
Once that’s been taken care of, build the library, open a REPL for a quick test to see if we have count available and that it behaves as expected on a simple example:
> import pykx as kx
> t = kx.toq(df)
pykx.Table(pykx.q('
    Person  Age Single
    ------------------
    John   24.0      0
    Myla             1
    Lewis  21.0      1
    John   33.0      1
    Myla   26.0      0
'))
> t.count()
pykx.Dictionary(pykx.q('
    Person    | 5
    Age       | 4
    Single    | 5
'))
Great! Time to move on to proper testing!
Testing
Now that we have developed our function, we would want to write some unit tests to make the functionality resilient to code changes. For the pandas API, they are coupled together in the tests/test_pandas_api.py file. We can see that in that same directory we have different test_pandas_*.py files which contain tests for specific functionality, but most tests for the pandas_meta.py file are held here.
Since we are mimicking functionality on the function we developed, our tests should reinforce that fact. For count we should test:
- Counting on a table with null values.
- Counting on a table with non-numeric values.
- Counting on the two available axes.
At this point, we could write some code on the test file and hope for the best, but I personally recommend installing Jupyter inside the venv as mentioned before so that whenever we build our library, it becomes available on a notebook where we can quickly start prototyping our test cases. It may look a bit overkill, but for larger functions with much more complex logic the functionality may need to be adjusted as edge cases are located. Whenever this happens, the ability to quickly prototype your test cases could be crucial and Jupyter allows us to do just that.
However you may choose to develop your tests, our input for this function could look something like this:
tab = q('([] k1: 0n 2 0n 2 0n ; k2: (`a;`;`b;`;`c))')
df = tab.pd()
Where we take care of both of our testing cases and make the table available for using both pandas and PyKX functions.
As for the assertions, we are going to take advantage of PyKX’s ability to convert between PyKX objects and Python ones to make sure that our function returns the expected values.
A simple assertion could look something like this:
qcount = tab.count().py()
pcount = df.count()

assert int(qcount["k1"]) == int(pcount["k1"])
assert int(qcount["k2"]) == 3
First off we want to run count on both the PyKX table and the pandas DataFrame and since the result of our count function is a q dictionary, we can use .py() to convert it to a Python one and then perform the actual assertions after that.
After this set of assertions, we should test our count function with different parameters:
qcount = tab.count(axis=1).py()
pcount = df.count(axis=1)

assert int(qcount[0]) == int(pcount[0])
assert int(qcount[1]) == 1

qcount = tab.count(numeric_only=True).py()
pcount = df.count(numeric_only=True)
so
assert int(qcount["k1"]) == int(pcount["k1"])
After everything has been taken into consideration, we would want to actually run our test. To do that, we can use the following command template:
python3 -m pytest -vvv -n 0 --no-cov --junitxml=report.xml tests/{test_file_name_here}::{test_name_here}
In our case, the specific command would look like this:
python3 -m pytest -vvv -n 0 --no-cov --junitxml=report.xml tests/test_pandas_api.py::test_pandas_count
If we wanted to run all tests on a file, we can do it with the following command template:
python3 -m pytest -vvv -n 0 --no-cov --junitxml=report.xml tests/{test_file_name_here}
Or, in our case:
python3 -m pytest -vvv -n 0 --no-cov --junitxml=report.xml tests/test_pandas_api.py
If all our test cases are well designed and have passed, we should be pretty much good to go!
Linting
As mentioned on the README file, PyKX should follow the pep8 conventions that the default pflake8 enforces. Simply running
pflake8 {path/to/file} should tell us if our code follows said rules. In our case, we would have to run it for both the pandas_meta.py and test_pandas_api.py files. Once the output of pflake8 shows no warnings, we can move on to documenting our new function.
Documenting our code
In the case of our count function, the documentation should be written on the docs/user-guide/advanced/Pandas_API.ipynb notebook. Locate the function “family”, take a look at the documentation’s structure and use it as a reference. Be sure to provide the function’s interface and some examples of use.
Opening a Pull Request
As with most open source projects, code additions should be handled through pull requests. If you are not familiar with pull requests, you can take a look at this guide written by GitHub.
Before opening the pull request itself, we should first open an issue following the template prepared beforehand by the PyKX team. Then, open the pull request from your local branch to the upstream main branch, linking it with the issue and following the template located here.
Conclusions and general tips
Hopefully we have encouraged you to make your own contribution to PyKX and help grow this fantastic library. Our team has been working on different contributions to the pandas API in recent times, and we had both learnt and enjoyed a lot in the process. Some examples of functions that are currently available in PyKX as of this writing that were developed by us are add_prefix and add_suffix, skew, count, std, etc. Here are some quick tips that we found useful when developing these functions:
- Try to blend your code as much as possible with the existing codebase.
- Follow their programming philosophy as stated on the
DEVELOPING.mdfile. - Write thorough tests. They can help you identify “holes” in your logic.
- Reach out to the PyKX team if you have technical questions via their support page.
- Try to learn as much as possible in the process!
We are still working on two more batches of functions, so keep an eye on those issues if you want to be up to date!
If you are looking for a challenge, here are some examples of pandas API functions that could be interesting to implement:
But there is more to the library than the pandas API! There are plenty more things that could prove interesting to explore like how toq works (more info in the pykx/src/cast.py file), database management (currently beta, use with the pykx.db module), etc. Happy open-source coding!
Acknowledgments
All errors in this post are our own, but we are extremely grateful to Conor McCarthy and the friendly PyKX Team for taking the time to meet with us on several occasions and guide us through the process of contributing to PyKX.
Connect with us!
We are Habla Computing, a small company based in Madrid with a bunch of passionate Functional Programmers and Data Engineers specializing in Scala, Spark and kdb+/q.
We’ve just launched a new meetup series featuring hybrid events (in-person + streaming) focused on kdb+/q. Join us at Everything Everywhere All with kdb/q, you can register here!.
Interested in leveraging our expertise? Whether it’s Scala, Spark, kdb+/q, or any of our other services, contact us directly or connect via LinkedIn. We’d love to hear from you!